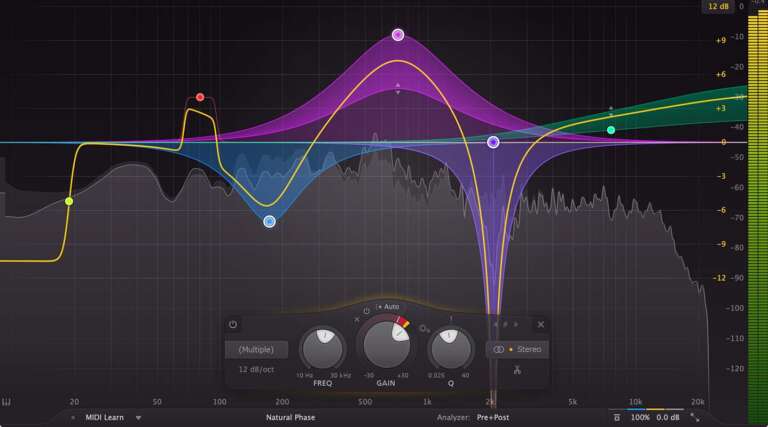
Cubase 10.5 introduced a new Spectral Comparison Mode in the Channel EQ along with the huge update list. This mode will speed up your mixing and mastering workflow substantially. Basically, it allows you to compare the spectral curves of different tracks right within a single EQ display. Additionally, you can also adjust the frequencies of those tracks without having to open the separate EQ module for each track.
A surprising number of mixing engineers make the mistake of not leaving room for tracks sharing the same frequencies. Some of the engineers also omit this process due to strict time constraints. Now with the introduction of Spectral Comparison Mode in Cubase 10.5, audio engineers can easily find tracks with conflicting frequencies and fine-tune the EQ to get a perfect balance.
Let’s take an example! So you’re in the middle of a mix and trying to figure out the muddiness. The bass sounds fantastic on its own, the kick sounds amazing when soloed. But in the full mix, neither your kick is punchy nor the bass is tight. Now let’s put the Cubase 10.5 Spectral Comparison EQ Mode into play to solve this issue. Open up the Channel EQ on either bass or kick track. In this case, let’s load this plugin on to the Bass track. Now you can see two options just above the spectral display in the Equalizer tab. One of them shows the reference track which is on the left. Towards the right, you can load up any comparison track you want. So, we definitely want to add the Kick track since to check the problem areas.
Now play the mix and you will see spectral frequencies of both the tracks in the same EQ display. Cubase Spectral Comparison EQ Mode shows the frequency curves of both tracks in a different color so you can better distinguish them to analyze effectively. You can also Solo either of the tracks. Coming to the analyzation part, carefully determine if the fundamental frequencies of the reference and comparison track. If those fundamental frequencies are in the same zone then congratulations, you’ve found the culprit resulting in a muddy mix.
The final step involves tweaking the EQ to separate the same fundamental space they are sharing. At this moment, you have to decide the track that you will compensate to bring out the other. If the crucial element of your mix is Kick, then select the comparison Bass track in the EQ window and dip the EQ of the Bass in the same frequency zone. Now bring it up right where the next fundamental frequency of the bass resides.
The steps are not done yet. Switch over to the reference Kick track in the same window and now dip the kick at the same zone where you boosted the bass. As a benefit, both these low-end tracks won’t share the exact same space resulting in a cleaner low end. Moreover, you can add more boost to the main fundamental frequency of the kick track to add even more punch to it.
Remember, it is not necessary that the same frequency sharing mixing problems will only be associated with the low-end. This was just an example for low end, but your mix could possibly have numerous tracks sharing the same space in low mids, mids, high mids, and highs. So rather than putting tons of EQ plugins with tons of analyzers, you can save a lot of time with this new Spectral Comparison EQ Mode in Cubase 10.5. You also have the freedom to control the transparency of both the reference and comparison channel curve. Along with that, there are several options to show or hide controls.
You may also like this post on the powerful Izotope Ozone 9 plugin.


